Getting started
Bring an outfit already in your Unity project onto your scene avatar, then choose how you want to switch between looks.
Before you begin
Use a Unity 2022.3 avatar project with VRChat SDK3 Avatars and Modular Avatar installed. This guide was checked against a Unity 2022.3.22f1 project. Import the avatar, clothing, shaders, and any dependencies required by their creators first.
Avatar Wardrobe indexes your imported prefabs. It does not download outfits or include the avatar and clothing shown in this guide.
Windows releases include a Python runtime for indexing. On macOS, python3 must be available on PATH. Optional Apple Intelligence naming features require macOS 26 or later; normal wardrobe browsing and installation do not.
Install and open the tool
- Import AvatarWardrobe.unitypackage into Unity and wait for compilation to finish.
- Open your avatar scene and select the avatar root in the Hierarchy.
- Open Tools → Avatar Wardrobe, then click Open Wardrobe to open it in your browser.
Avatar Wardrobe indexes your assets automatically. You can follow its progress in the bottom status bar.
Check the target
The avatar name in the browser header should match the avatar you intend to edit. Selecting a different avatar in Unity can change the target.
Get to know the workspace
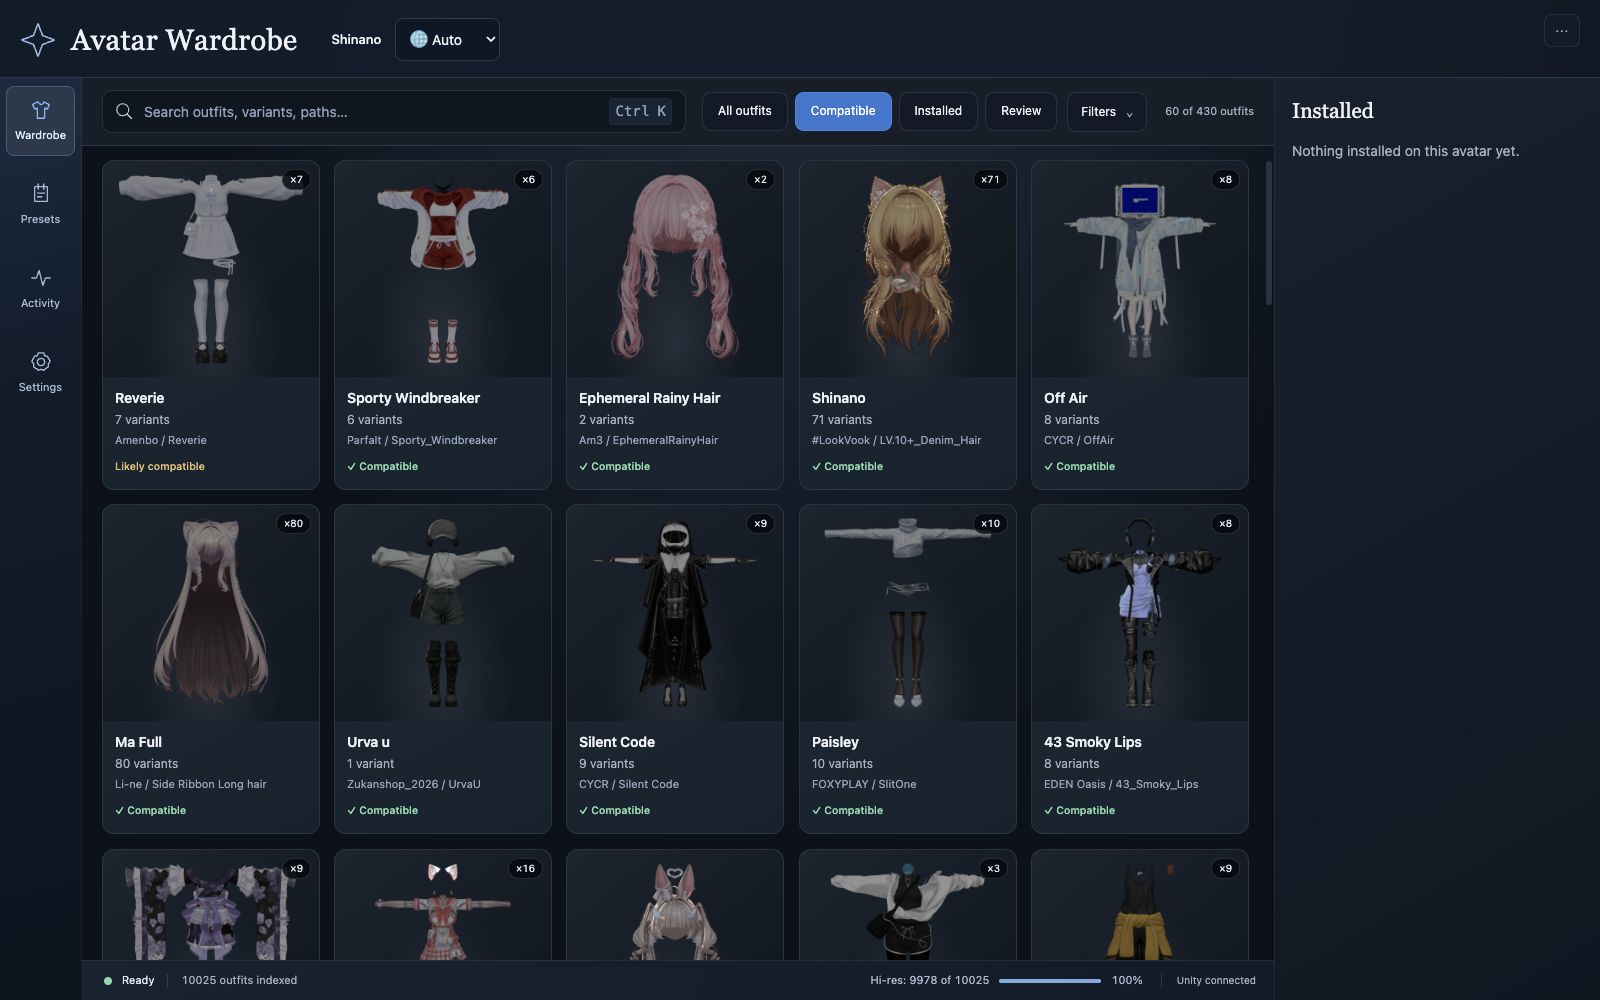
The catalog is the starting point. The header identifies your avatar; the bottom bar shows indexing, previews, and the Unity connection.
| Area | Use it to |
|---|---|
| Wardrobe | Find outfits, inspect variants, and install items. |
| Presets | Organize looks, shared items, and menu groups. Separate-avatar mode also shows upload controls. |
| Activity | Check catalog indexing, preview progress, and connection state. |
| Settings | Choose the upload mode, compact cards, and maintenance tools. |
| Installed sidebar | Review installed catalog items grouped by preset. |
Add your first outfit
- In Wardrobe, start with Compatible and search for an outfit you imported.
- Open its card and select the variant you want.
- Choose a Preset. Use Common Preset for a shared item, or create a named preset with the + beside the preset selector.
- Click Add to preset and wait for Unity to finish.
- Check the item in Unity and in the Installed sidebar. Inspect its fit, materials, and movement before relying on the compatibility label.
- Save your Unity scene.
Continue with installing items for removal and part toggles, or building presets to put several looks together.