Upload avatars
Decide whether you want one avatar with selectable looks or one uploaded avatar for each preset. The same preset records support both workflows.
Upload one combined avatar
- Turn Settings → Upload each preset as a separate avatar off.
- Verify your named presets, Common items, and generated menu controls in Unity.
- Save the scene and use the VRChat SDK's normal build-and-upload workflow for the combined scene avatar.
The browser hides per-preset upload controls in this mode. Your saved preset upload settings remain available if you switch back later.
Upload a named preset
- Turn Upload each preset as a separate avatar on in Settings.
- In Unity, save the scene, open the VRChat SDK Control Panel, and sign in. Confirm the target avatar in the Wardrobe header.
- Open Presets and find the intended named preset. Check its Items and any Blendshapes overrides.
- Select the required Windows, Android, and/or iOS platform settings. Your project still needs the appropriate Unity build support and platform-compatible assets.
- Review Avatar ID. Leave it empty for a new avatar. To update an existing avatar you own, enter its valid
avtr_…ID and click Save. - Review Defaults for first-upload naming, description, release status, and thumbnail settings.
- Click that preset's Upload, review the confirmation, and follow any SDK first-time upload prompts in Unity.
- Wait for the job result. Check the saved Avatar ID and upload log before starting another upload.
Avatar ID determines the upload target
An empty ID starts the new-avatar flow; an existing ID identifies an avatar to update. Renaming a preset does not give it a different ID. Verify the field before uploading.
The uploader stages the selected preset from a clone of the source avatar, keeps its Common content, and carries the preset's stored configuration into the upload. A successful first upload saves the returned Avatar ID.
Upload several presets
Enable Include in batch upload on each named preset you want to process. Review each one's platform choices and ID, then click Upload All.
Start with one preset to verify the setup before using a small batch. Preset-batch jobs cannot be cancelled mid-flight from the browser. Keep Unity open and wait for the engine to finish before starting another job.
A Unity script reload can interrupt browser progress polling even when the engine has resumed. Check the Unity window and upload log before retrying; do not assume a disconnected progress bar means the upload never happened.
Configure defaults
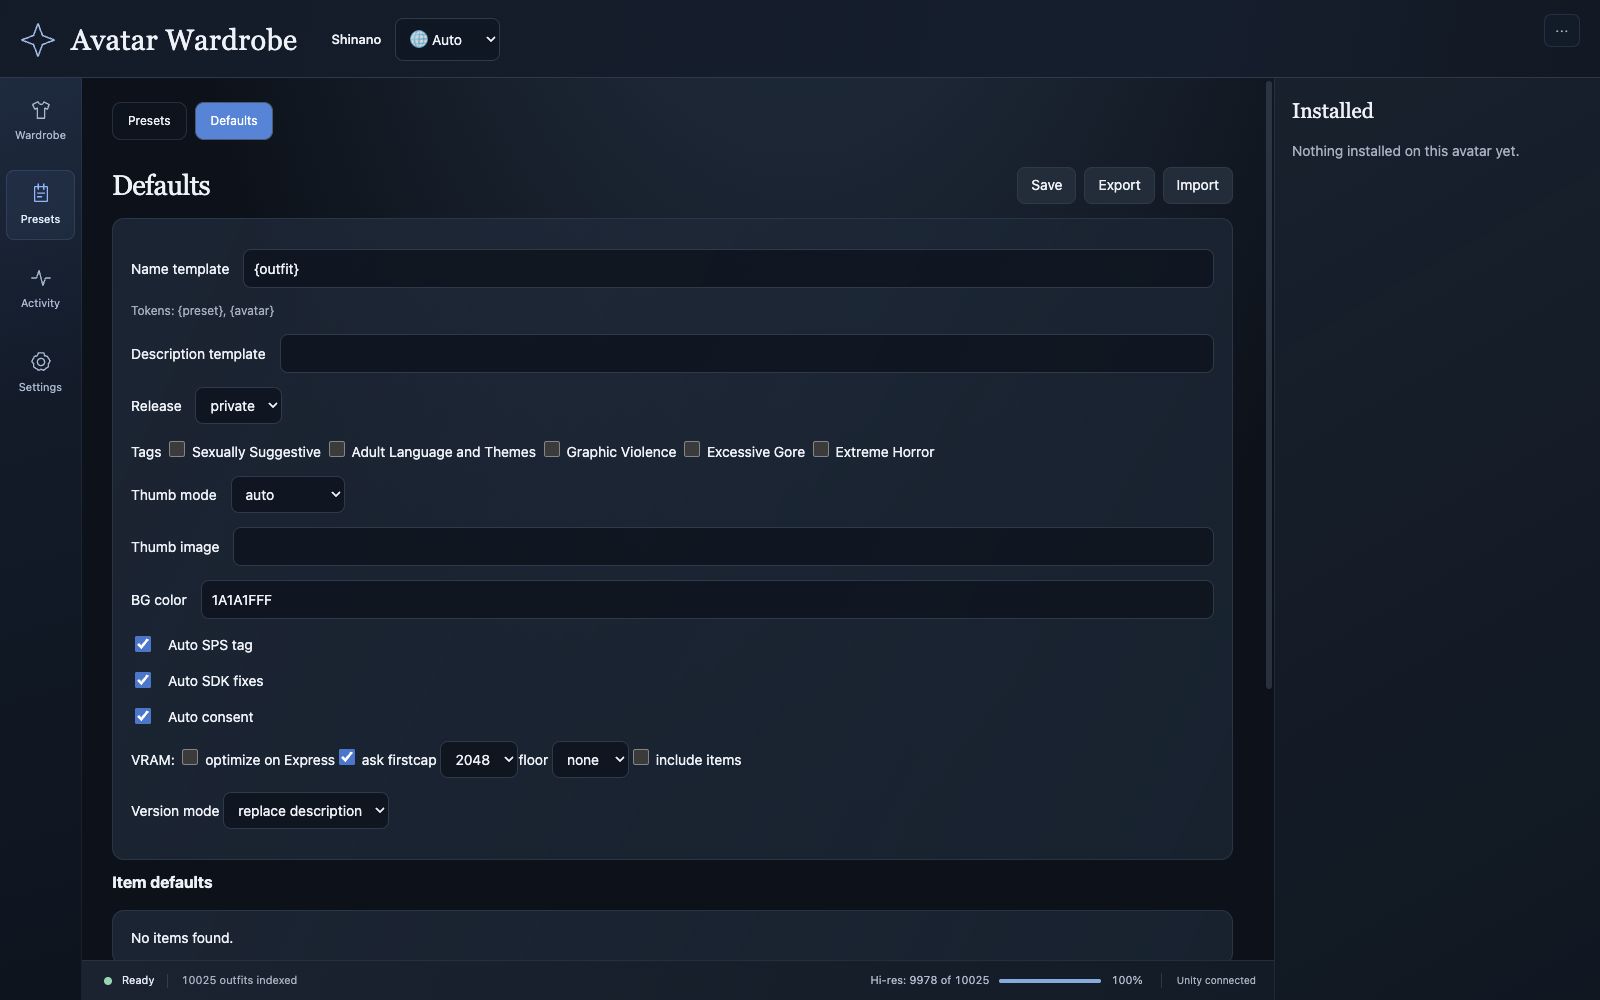
Defaults is available in separate-avatar mode. Save changes before using the first-upload or Express workflows.
Use Presets → Defaults to configure the shared first-upload/Express settings:
| Setting | What to choose |
|---|---|
| Name / Description template | Use {preset} and {avatar} for the preset and parent avatar names. The older {outfit} token remains supported as a preset alias. |
| Release | The intended private or public avatar release status. |
| Tags | Applicable content tags; review automatic tagging choices as well. |
| Thumb mode | auto, scene view, or image, with the image path and background color where relevant. |
| VRAM | Whether Express should optimize textures, ask first, include items, and apply a resolution cap/floor. |
| Version mode | Replace the description or append a version line, as appropriate for your workflow. |
Click Save after editing. Export and Import back up and restore uploader settings; they do not back up the avatar assets or Unity scene.
Blendshapes and advanced Unity tools
Open a preset's Blendshapes section to load its controls. It supports searching, capturing current skin values, and choosing explicit overrides. If loading fails, close and reopen the foldout to retry. These settings belong to that preset.
The browser's current preset cards do not expose every batch-engine feature. Use Tools → Shiro → Outfit Batch Uploader for advanced workflows such as dry-run reports, thumbnail and VRAM checks, and Express/advanced setup where available. This is a second surface for the same engine, so avoid starting overlapping jobs.
FaceEmo controls are currently hidden in the browser. Existing assignments remain saved; use the Unity tooling when you need to manage them.
Texture changes are shared
Applying VRAM optimization changes texture import settings. A texture used by several presets changes for all of them, and these import changes are not covered by the optimizer's Undo. Review the plan and keep a project backup before applying it.