Install & remove items
Installing adds an instance of the selected prefab to the current scene avatar. The destination preset determines which look owns that instance.
Install into the right preset
- Open an outfit card and choose its variant.
- In Preset, select Common Preset for shared hair or accessories, or a named preset for an item belonging to one look.
- Choose an existing Menu Group if this item should be one of several mutually exclusive options. Leave No menu group for an ordinary item.
- Under Advanced options, optionally enable Generate toggles for independent controls over the prefab's direct children.
- Click Add to preset. Wait for the controls to become available again and check the installed result in Unity.
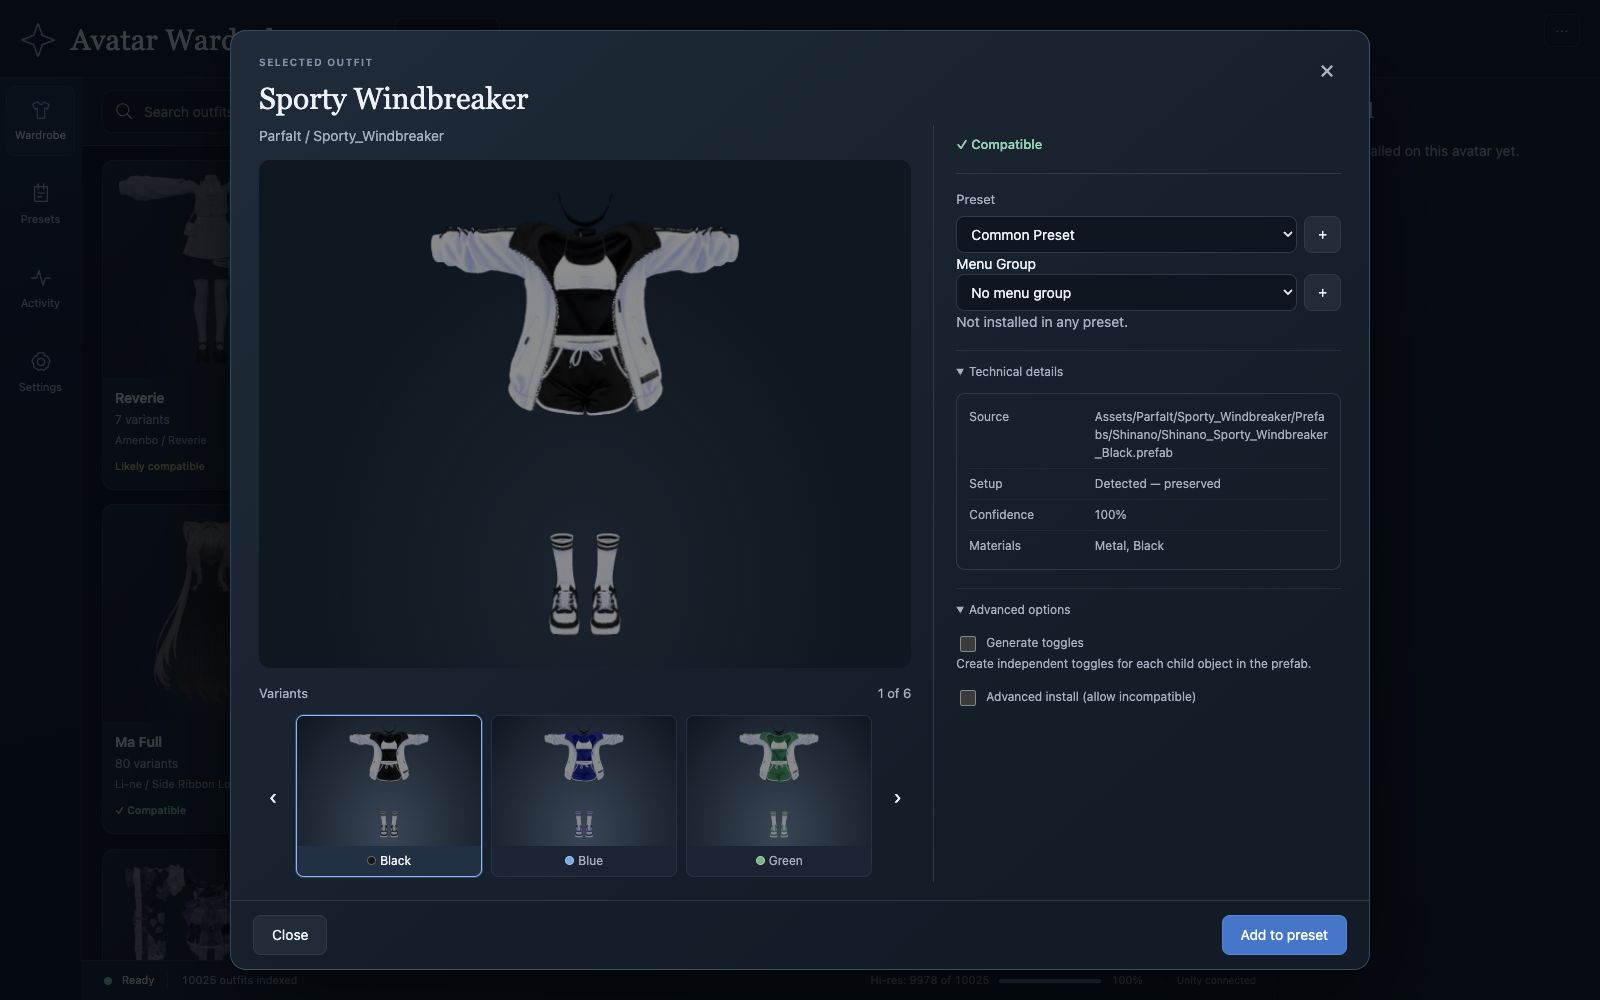
The inspector keeps the destination and final Add action together. Technical details can help confirm you picked the intended source prefab.
Common Preset installs shared items at the avatar root. Existing scene-backed presets keep their outfit folders. Installing the same source into another preset creates a separate instance, so check the destination each time.
Existing outfit setup
Detected creator setup is preserved. If the clothing needs particular body blendshapes or dependencies, complete those steps in Unity too.
Check an existing installation
The inspector lists the presets containing the selected prefab. Their dropdown options are marked (installed). Common items remain labeled Common; they are not listed as a separate installation in every named preset.
The Installed sidebar groups catalog items under preset headings. Expand a heading to inspect its contents. The preset's Items section also lists detected scene contents, including nested prefab members.
Remove one copy
Choose the correct preset in the inspector before using Remove, or remove the item from that preset's Items section. Confirm the named destination in the removal prompt.
Removal affects that preset's scene instance and its group membership. Other preset copies and the original prefab asset remain. Unity Undo covers the scene removal.
Independent part toggles
Generate toggles creates a submenu named after the prefab with independent controls for its direct child objects, including inactive children. Enable it if you want separate switches for parts of one installed item.
For an existing installation, checking or unchecking the option immediately generates or removes that selected preset instance's part menu. Removing the generated menu restores the recorded child visibility defaults. It does not remove the outfit or its Menu Group membership.
Menu groups and toggles explains which kind of control to use.
Advanced install
Advanced install (allow incompatible) bypasses the normal compatibility restriction. Use it only when you understand the required fitting or retargeting work. It does not convert an outfit to your avatar automatically.